As someone who once suffered from intense low back pain, I remember going to yoga classes and coming out feeling worse than when I entered. I knew that the low-impact exercise was a great way to strengthen my core (including my back muscles) and in turn, help reduce my back pain, but something wasn’t quite clicking.
I decided to become a certified yoga instructor myself and learned the ins and outs of every pose and how each affected my body. With this base knowledge, I was able to adapt my personal practice so that I’d leave yoga class pain-free.
Much of the time, instructors are leading a practice for a large group, making it hard to pay special attention to every single student’s form. That’s why I equip my private clients with the same cues that I use to reduce the pressure placed on my low back during specific poses. Not only do these cues protect your back, but they will help relieve shoulder, elbow and wrist pain during your practice as well. (Not to mention, help you get more out of each pose!)
Here are the five need-to-know adjustments that will help you flow through your practice pain-free:
Pull your navel in at (almost) all times
Whether you’re bending forward, stretching with your arms over your head, or in a warrior position, pulling your navel in towards your spine engages the abdominals and helps keep your back from over-arching. While there are some yoga poses that focus on strengthening the core, usually in a pose like a swan dive or forward fold, the cue is to lengthen the spine and stretch the hamstrings. But when you bend forward at the waist, engaging your abs is crucial to maintaining the integrity of your body’s alignment.
Relax your shoulders
While your arms are overhead, you will often hear your yoga instructor say to reach the fingertips towards the ceiling and ground down through the feet. However, another important cue while the arms are up over your head or when they’re at shoulder height (like in Warrior II), is to relax the shoulders down away from the ears. This helps prevent neck and upper back tension. You can do this by shrugging your shoulders up towards your ears and then releasing them down. Or if you’re near a mirror, you can glance at your upper body to make sure the shoulders aren’t hunching up towards the ears.
Engage your inner thighs
In plank position, upward facing dog, mountain pose, and many other poses, squeezing the inner thighs towards each other can be a cue that’s overlooked or not stated. Whether your inner thighs are touching or not, intentionally squeezing them towards the midline of your body is important to keep the core and centerline tight. This can help prevent low back pain and even help improve posture.
Step the feet hips-distance apart
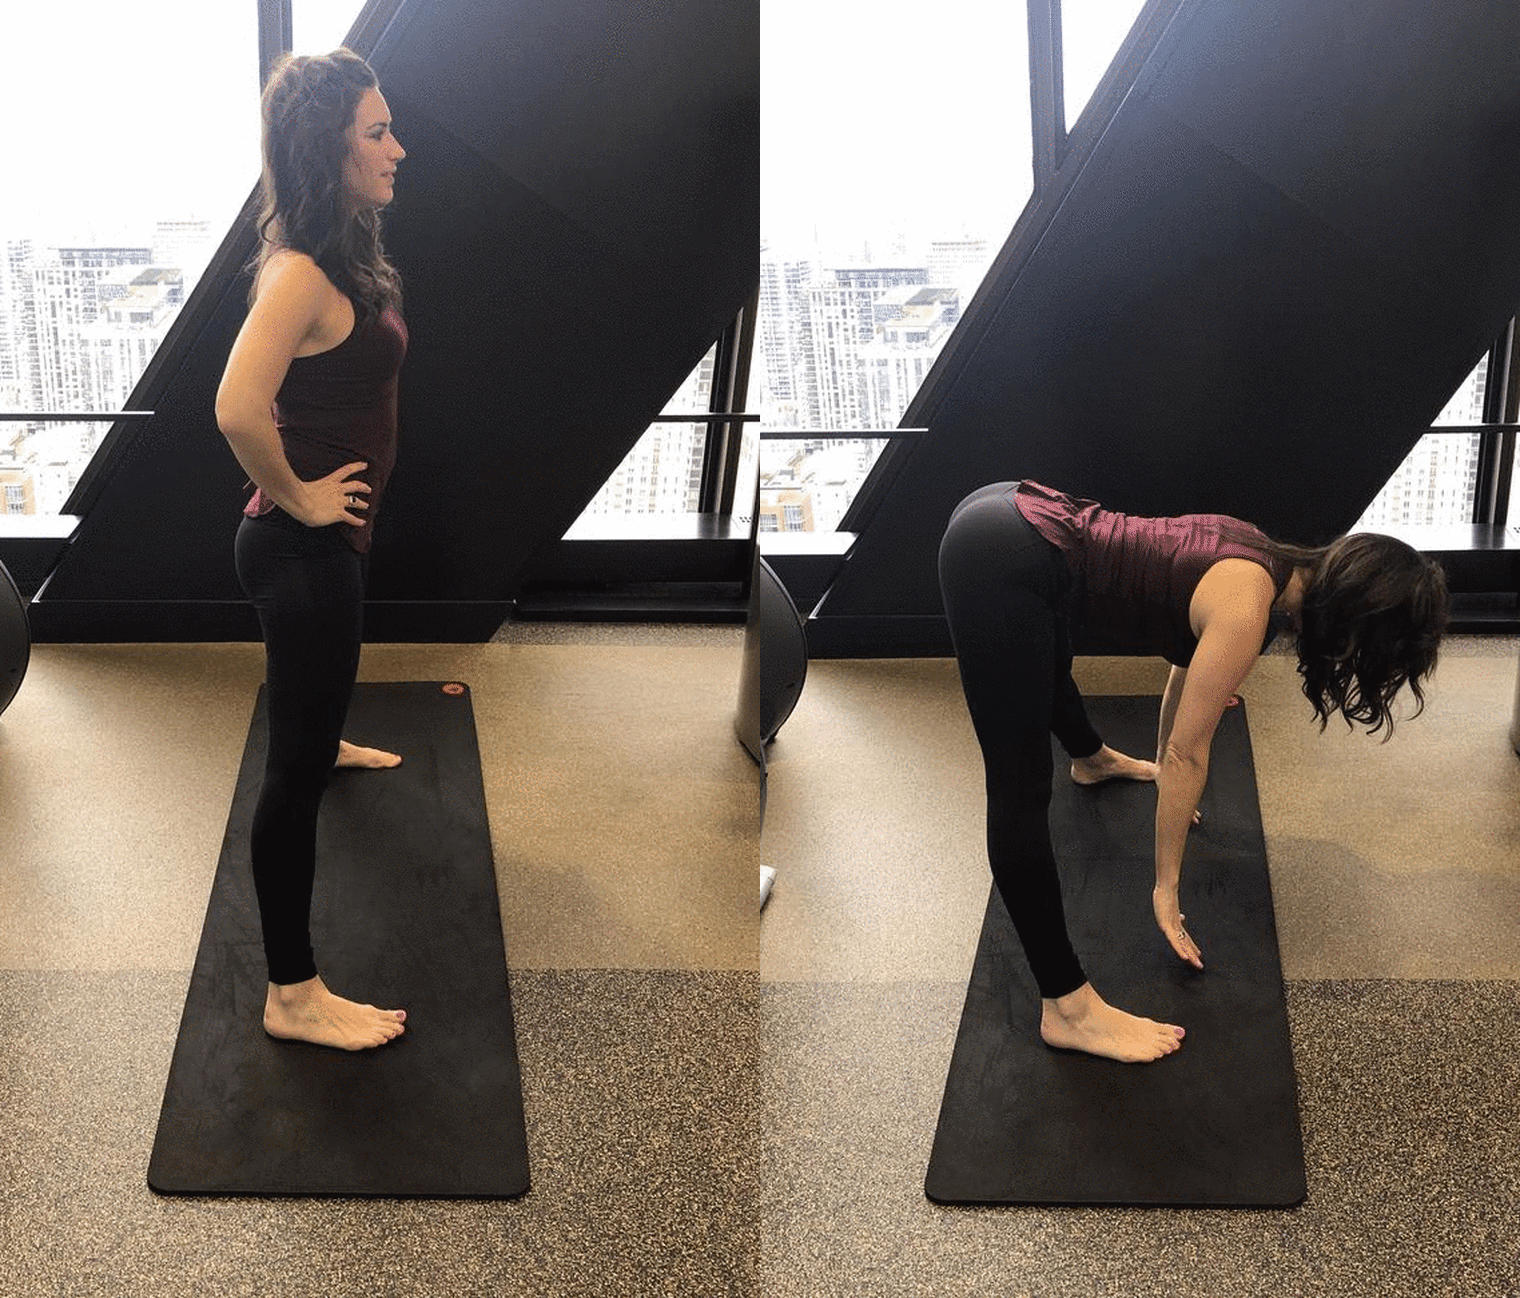
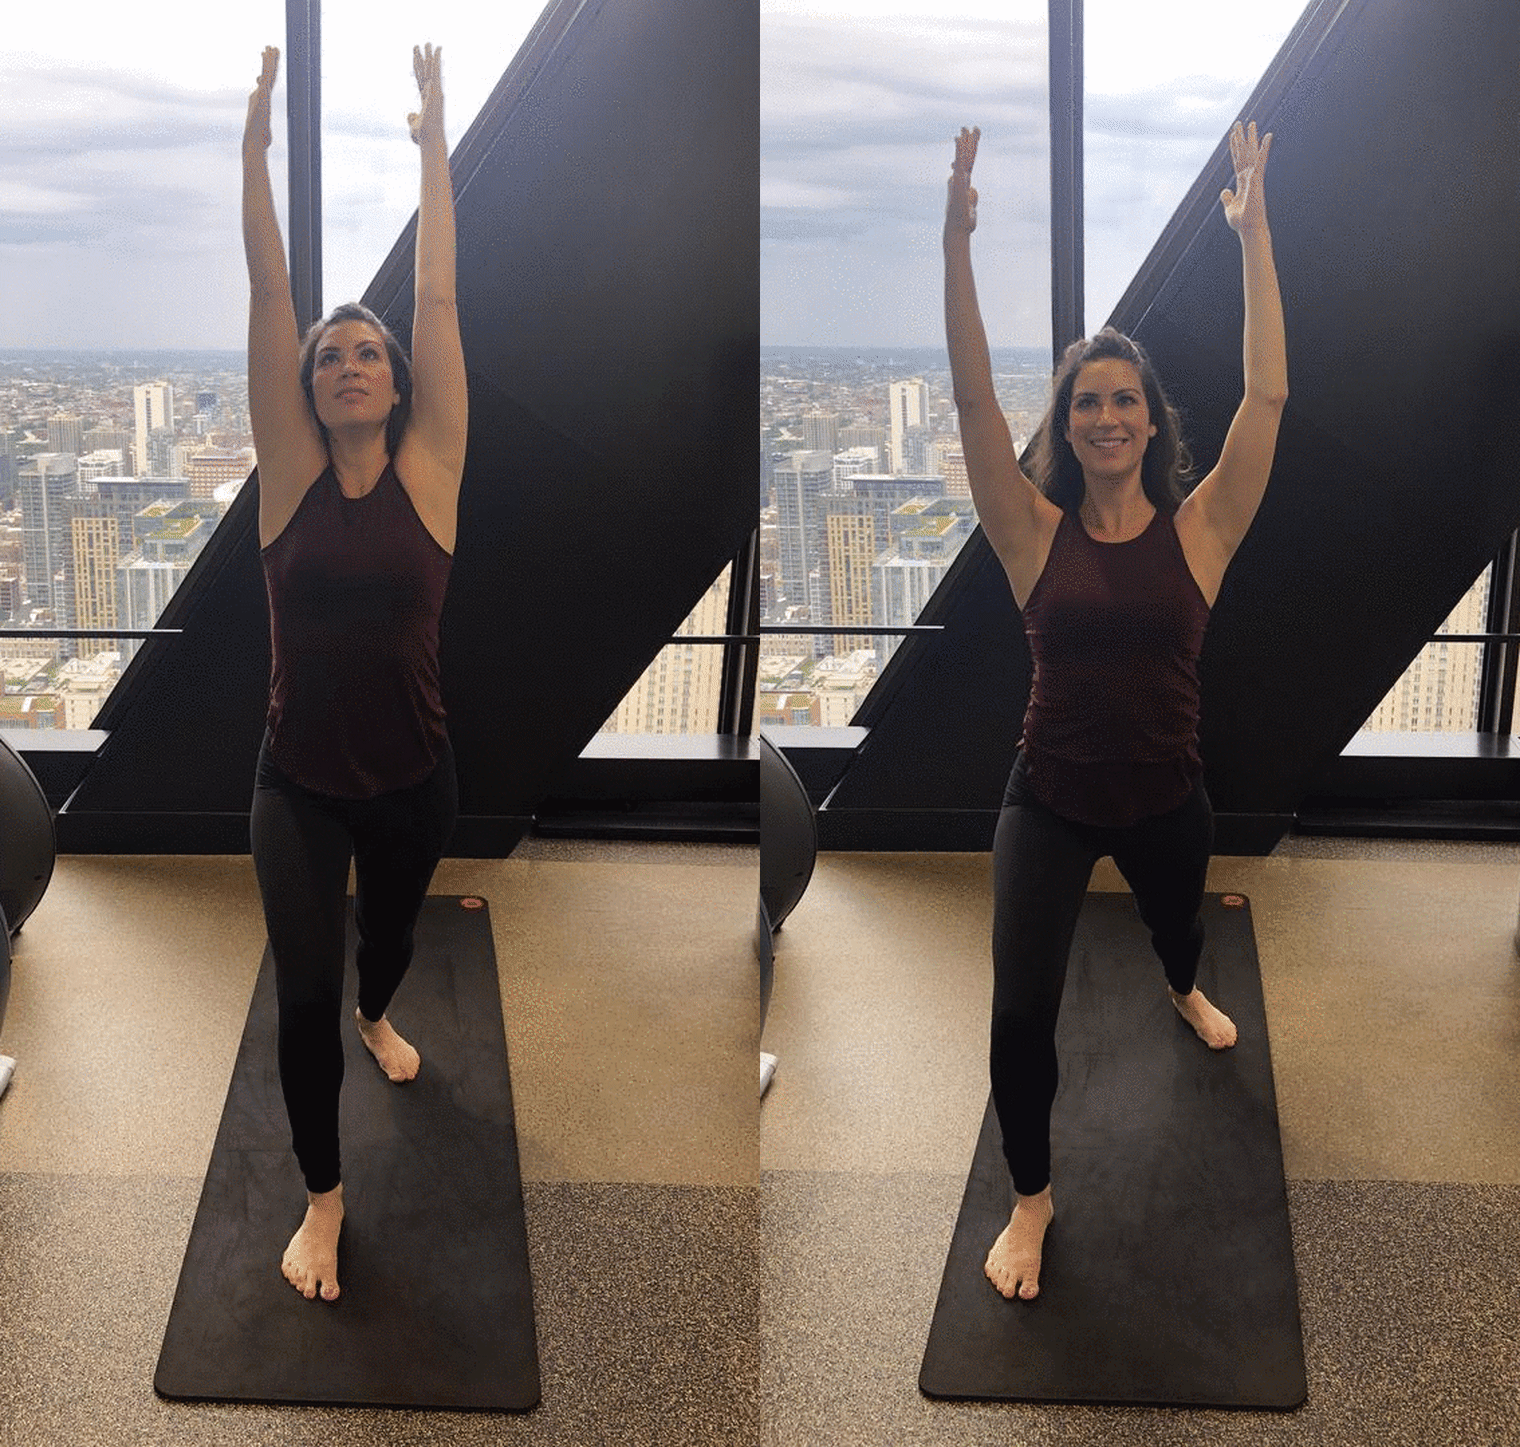
In poses like crescent pose, Warrior I, and standing forward fold, opening the feet as wide as the hips allows more room for the pelvic floor and low back to release instead of tighten. Typically the cue is to step one foot forward and one foot back in crescent pose and Warrior I; in a forward fold, the big toes touch or the feet are fist-width distance apart. However, if you suffer from low back pain or over-arch your low back in these positions, step your feet out as wide as your hips.
Turn the hands out
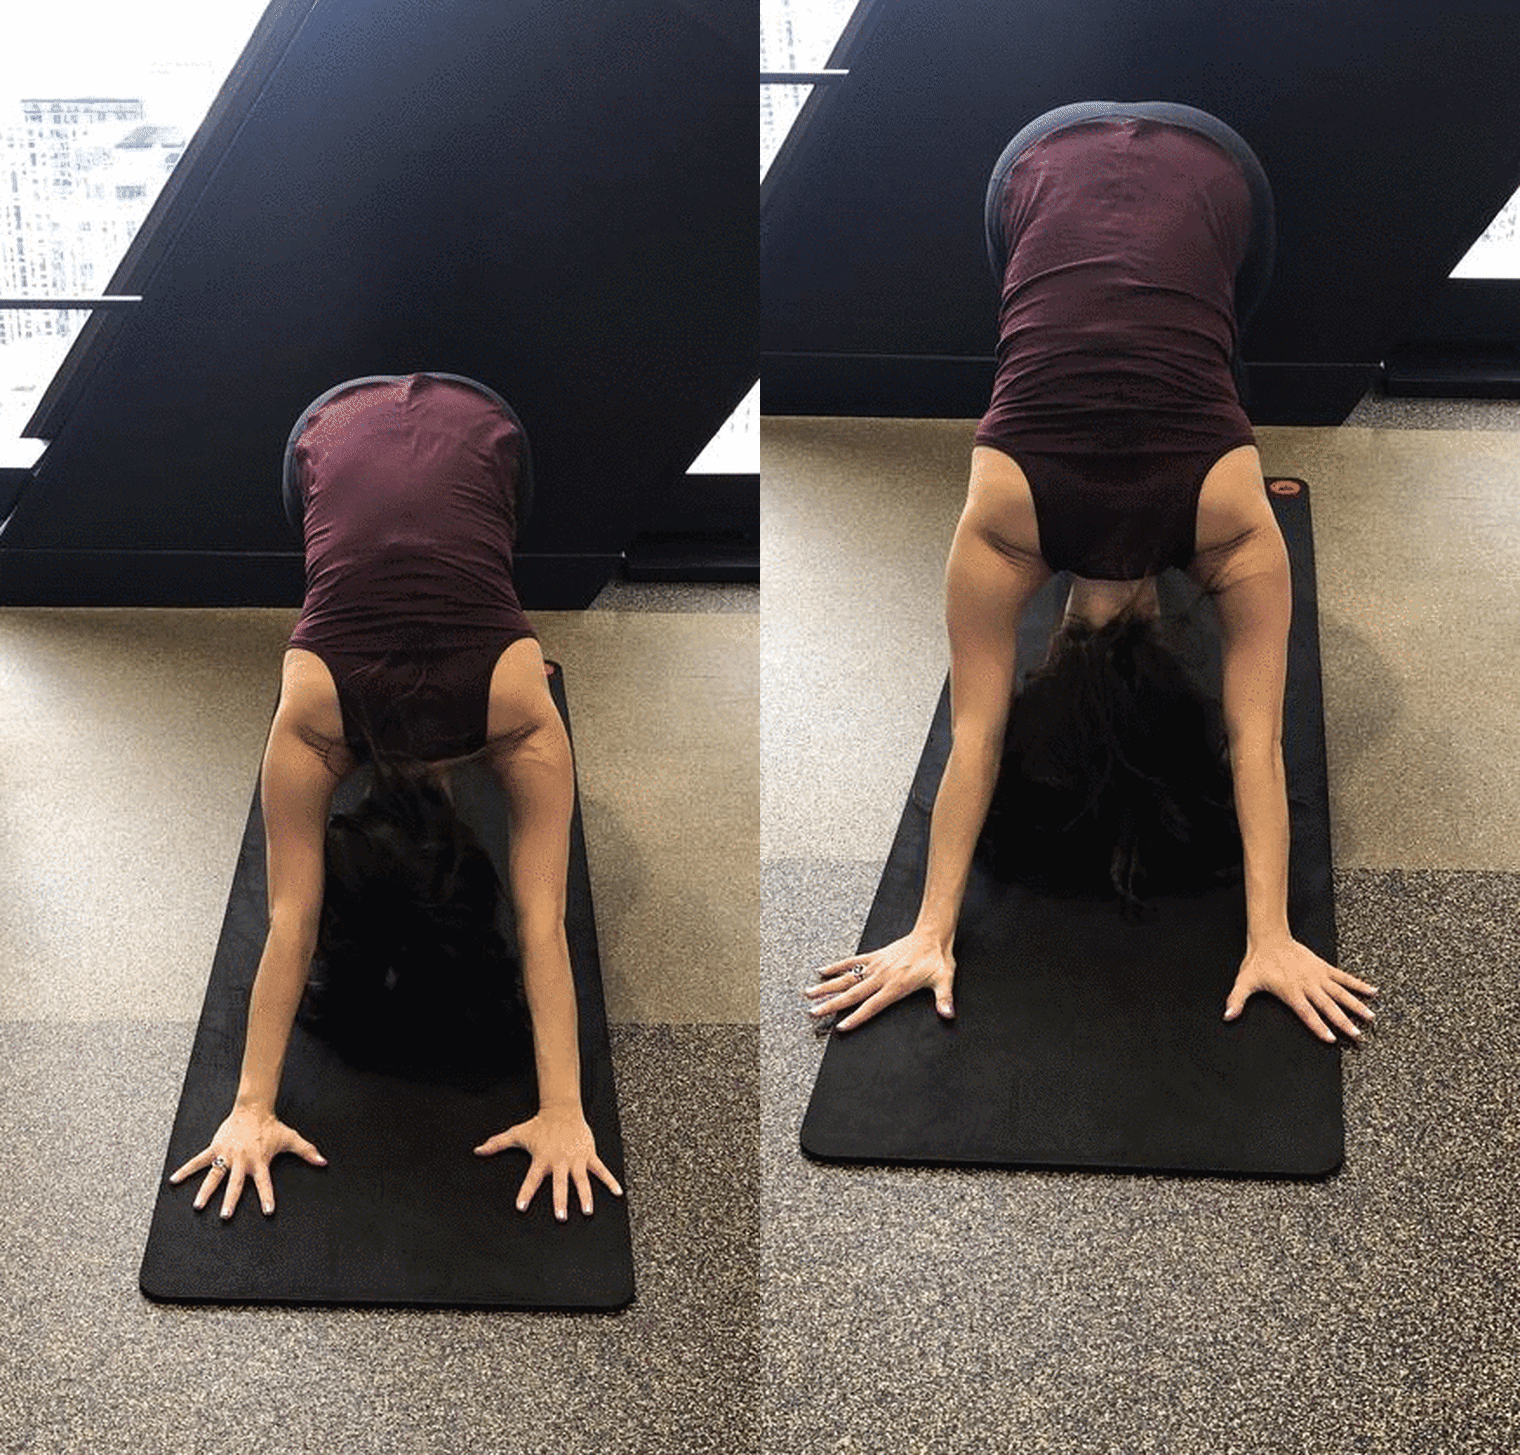
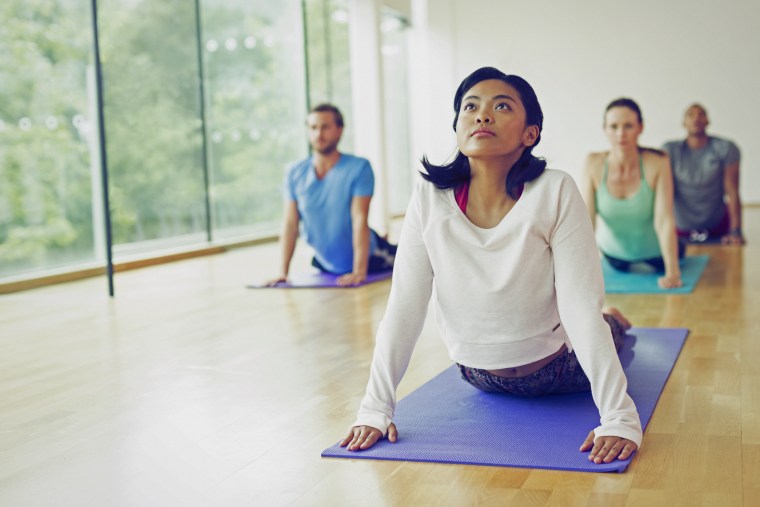
In poses like downward facing dog and cobra, the typical cue is to keep your hands, wrists and forearms in alignment, parallel with the sides of your mat. However, if you have tight shoulders, or elbow or wrist issues, try turning your hands out away from the center slightly. This allows the shoulders to have more space and takes pressure off of the wrists.
Put the cues to work in these staple yoga poses
You will see these common poses in every yoga class. Here's how to apply the adjustments above to reduce pressure on the low back and wrists, and keep your practice pain free.
Forward Fold

Cue: pull the abs in, step feet hips-distance apart
Instead of keeping your legs together as you hinge forward, first step your feet hips-distance apart (this is called mountain pose). Then, hinge forward at the hips and pull your navel in towards your spine as you reach your arms down towards the ground. These cues can also be used in plank and downward facing dog.
Warrior I

Cue: Shoulders down, feet as wide as the hips
Standing straight, step one foot back, making sure the feet are as wide as the hips. Turn the back foot out on a diagonal and reach the arms up over your head. Pull the navel in towards your spine and relax the shoulders down away from the ears.
Downward Dog

Cue: Hands turned out, engage the inner thighs
Begin on all fours. Tuck your toes and push evenly through your hands, lifting your hips high and reaching your butt toward the ceiling while pressing the heels toward the floor. In the final position you will form an upside down "V" with your body. Then, turn the hands out slightly, pull the navel in towards the spine, squeeze the inner thighs in towards each other. These cues can also be used in cobra and wheel pose.
More ways to reduce pain and injury
- What is plantar fasciitis? And what can you do to relieve the pain?
- Tips and stretches to reduce wrist and shoulder pain when working out
- 10 core exercises that are better for your back (and body) than crunches
- How to reduce knee and joint pain during a HIIT class
- How to work your abs without neck or back pain
Want more tips like these? NBC News BETTER is obsessed with finding easier, healthier and smarter ways to live. Sign up for our newsletter and follow us on Facebook, Twitter and Instagram.

